As a busy mom, I know how crucial it is to have a simple biscuit recipe. This easy biscuit recipe for beginners is perfect. It makes fluffy, flaky homemade biscuits great for breakfast, brunch, or dinner.
You can bake biscuits quickly with just a few simple ingredients and steps. In no time, you’ll have freshly baked biscuits ready.
Table of Contents
Why Homemade Biscuits Are Worth Making
Homemade biscuits are a true delight, offering a taste and texture far surpassing their store-bought counterparts. These flaky, golden pillows of Southern biscuit tradition are a beloved staple. They grace breakfast tables and dinner plates alike. From their irresistible aroma to their comforting, tender crumb, homemade breakfast bread is an experience worth savouring.
One of the primary advantages of making your biscuits is your control over the ingredients. By crafting them from scratch, you can customize the flavours, adjust the fat content, and ensure the use of high-quality, fresh components. This level of personalization allows you to cater to individual preferences and dietary needs. Making homemade biscuits is a versatile addition to any meal.
“There’s nothing quite like the flaky, buttery goodness of a freshly baked homemade biscuit. It’s a true taste of the South.”
Making biscuits at home can be a rewarding and therapeutic experience. The rhythmic kneading, the careful folding of the dough, and the anticipation of the oven’s aroma all contribute to a sense of satisfaction and pride. Homemade biscuits are a testament to the enduring spirit of Southern hospitality and the joy of sharing a comforting, handcrafted treat.
Whether you serve them alongside a hearty breakfast, use them to soak up the savoury juices of a stew, or enjoy them on their own, homemade biscuits are a true delight. Their versatility and the personal touch they offer make them a worthwhile investment of time and effort. Every bite is a delicious reminder of the importance of homemade traditions.
Essential Ingredients for Perfect Biscuits
Making delicious biscuits requires the right mix of ingredients. The core of any biscuit recipe is all-purpose flour or self-rising flour, cold butter, and either milk or buttermilk. These ingredients combine to give biscuits their flaky texture and rich taste.
All-Purpose Flour vs. Self-Rising Flour
Choosing between all-purpose flour and self-rising flour changes how your biscuits turn out. All-purpose flour needs baking powder and baking soda to rise. Self-rising flour, on the other hand, already has these leavening agents, making baking easier.
The Role of Butter and Milk
Cold, European-style butter is key for flaky biscuits. Its fat and freezing temperature are crucial for the right texture. Milk or buttermilk adds moisture and flavour, with buttermilk bringing a tangy taste that many love.
Leavening Agents and Their Importance
Baking powder and baking soda are vital for biscuit making. They help biscuits become light and fluffy inside and have a golden crust. Get the right mix and use these ingredients correctly for perfect biscuits.
“The secret to making the best biscuits is all about the right ratio of ingredients and handling the dough with a gentle touch.”
Required Kitchen Tools and Equipment
The right tools matter a lot for biscuit cooking tips and making biscuits from scratch. They help make your biscuits flaky, tender, and perfectly risen. Here are the essential tools you’ll need:
- A large mixing bowl for combining the dry and wet ingredients
- A food processor (optional) for quickly cutting in the butter
- A biscuit cutter or a round glass to cut out the biscuit shapes
- A baking pan or oven-safe skillet to bake the biscuits
- Measuring cups and spoons for accurately portioning the ingredients
If you don’t have a food processor, a pastry cutter works great, too. It helps mix the butter into the flour until it resembles coarse crumbs. This ensures the butter is evenly spread for the best texture.
- ToolPurpose
- Mixing Bowl Combining dry and wet ingredients
- Food Processor: Quickly cut in the butter
- Biscuit Cutter: Cutting out the biscuit shapes
- Baking Pan Baking the biscuits
- Measuring Cups/Spoons Accurately portioning ingredients
With these tools, you’re ready to make delicious homemade biscuits. They’ll impress your family and friends. Also, check out creative dinner ideas for picky eaters to go with your biscuits.
Understanding the Science of Flaky Layers
You need to know the science to get the perfect flaky texture in your biscuits. The secret is using cold butter and the proper folding techniques, which are key to making your biscuits light and airy.
Cold Butter Technique
You must use cold, solid butter in the flour for flaky biscuit dough. When the butter melts in the oven, it creates steam. This steam separates the layers, making your biscuits flaky inside. Use chilled butter or grate frozen butter into the flour for the best results.
Proper Folding Methods
After mixing the dough, it’s time to fold it to create layers. The “letter fold” technique is simple yet effective. Fold the dough in half, then fold it again, like a letter. Repeat this a few times to build layers before cutting out the biscuits.
Temperature Control
Temperature is key when baking flaky biscuits. Make sure your oven is preheated to 425°F (220°C). This high temperature helps the butter melt quickly, creating steam. This steam lifts the layers, making your biscuits flaky.
By understanding the science of flaky biscuits, you’ll make light, tender, and irresistibly flaky homemade biscuits every time. For success in biscuit baking, use cold butter, perfect your folding, and control the temperature.
Step-by-Step Biscuit Recipe
Ready to bake up a batch of flaky, homemade biscuit recipe? Follow this easy step-by-step guide for perfect results every time. First, preheat your oven to 450°F. In a large mixing bowl, whisk together 2 cups of all-purpose flour, two teaspoons of baking powder, 1/2 teaspoon of baking soda, and 1/4 teaspoon of salt.
Next, use a pastry cutter or two forks to cut in 6 tablespoons of very cold unsalted butter until the mixture resembles coarse crumbs. Slowly pour in 1 cup of cold buttermilk, mixing just until the dough comes together. Be careful not to overmix.
- Turn the dough onto a lightly floured surface and gently knead it 3-4 times.
- Roll or pat the dough into a 1/2-inch thick rectangle, then fold it into thirds.
- Use a 2-inch biscuit cutter to cut out the biscuits, pressing straight down without twisting.
- Arrange the biscuits on a parchment-lined baking sheet, spacing them about 1 inch apart.
Bake the biscuits for 12-15 minutes until golden brown. Serve these tender, flaky homemade biscuit recipes warm and enjoy!
“These biscuits are so easy to make and turn out perfectly every time. The secret is in the cold butter and gentle handling of the dough.”
Mixing Techniques for Tender Biscuits
The right mixing technique is key to making tender and flaky biscuits. You can mix by hand or use a food processor. Each method has its benefits and requires careful handling to avoid mistakes.
Hand Mixing vs. Food Processor Method
Hand mixing means using a pastry cutter or fingers to mix cold butter into dry ingredients. This method lets you feel the dough’s texture and spreads butter evenly. On the other hand, a food processor can quickly mix butter and flour, creating a coarse mix in seconds.
Avoiding Common Mixing Mistakes
No matter your method, it’s important to avoid overmixing. Overmixing can make the biscuits tough and dense. The dough should look shaggy and crumbly, with butter specks visible. Keeping ingredients cold is also crucial for flaky biscuits.
“The key to tender biscuits is to handle the dough as little as possible. Overworking the dough can lead to a tough, dense texture.”
By mastering gentle mixing, you’ll make easy and flaky biscuits. Patience and attention to detail can significantly improve your biscuits.
Rolling and Cutting Perfect Biscuits
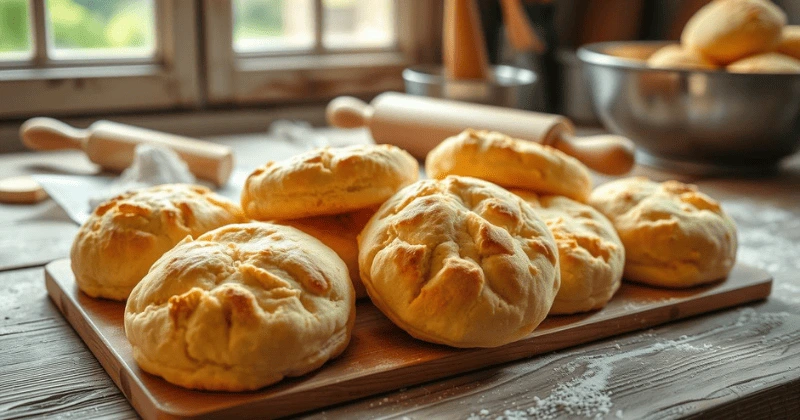
Making delicious homemade biscuits is more than just mixing ingredients. The secret to flaky layers is how you roll and cut the dough. Use your fingers to press the dough to 1-inch thickness. This gentle touch keeps the dough intact and prevents it from becoming tough.
For cutting, use a sharp biscuit cutter or a glass with a straight edge. Press down straight without twisting or even rising. Place the cut biscuits close together on the baking sheet. This helps them bake up taller and fluffier. Learning these biscuit-cutting tips is crucial for perfection.
| Nutrition Facts | Per Serving |
|---|---|
| Calories | 276 kcal |
| Carbohydrates | 35 g |
| Protein | 5 g |
| Fat | 13 g |
| Saturated Fat | 8 g |
| Cholesterol | 33 mg |
| Sodium | 229 mg |
| Potassium | 287 mg |
| Fiber | 1 g |
| Sugar | 3 g |
| Vitamin A | 399 IU |
| Calcium | 131 mg |
| Iron | 2 mg |
The recipe needs only three ingredients: self-rising flour, butter, and buttermilk. Cold ingredients and gentle folding create flaky layers. Baking for about 30 minutes yields warm, fresh, homemade biscuits. Enjoy them with your favourite toppings for a cosy meal.
“The secret to perfect biscuits is in the rolling and cutting technique. Forget the rolling pin and use your fingers instead for the flakiest results.”
Whether new to biscuits or experienced, mastering rolling and cutting is key. With practice and these tips, you’ll make biscuits that impress everyone.
Baking Temperature and Timing Guidelines
You must control the temperature and timing well to bake perfect homemade biscuits. Bake them at 425°F for 12-15 minutes. This high heat creates flaky layers and a golden-brown crust, making biscuits irresistible.
Oven Positioning Tips
Place the baking sheet in the middle of the oven for even heat. This prevents uneven cooking or browning. Keep an eye on your biscuits, as oven temperatures can differ.
Visual Doneness Indicators
- The biscuit tops should be a rich, golden-brown colour.
- Gently press on the biscuits – they should feel slightly firm but soft and tender.
- Avoid overbaking, as this can lead to dry, crumbly biscuits.
“Baking is a science, and getting the right temperature and timing for your homemade biscuits is crucial for achieving that perfect flaky texture.”
Follow these guidelines for baking temperature and timing to make delicious, bakery-quality biscuits at home. Remember, paying attention to detail and practising are key to mastering biscuit baking.
Essential Tips for Beginners
Making delicious biscuits is easy and rewarding but requires some biscuit-cooking tips. As a beginner, always keep these tips in mind for flaky, tender biscuits.
- Use freezing ingredients, like butter and milk, for flaky layers.
- Handle the dough minimally to avoid tough biscuits.
- Flour your work surface and rolling pin well to prevent sticking.
- When cutting biscuits, don’t twist the cutter to ensure proper rising.
- Make sure your oven is fully preheated for best results.
Follow these tips to master biscuit making and enjoy flaky, tender biscuits every time.
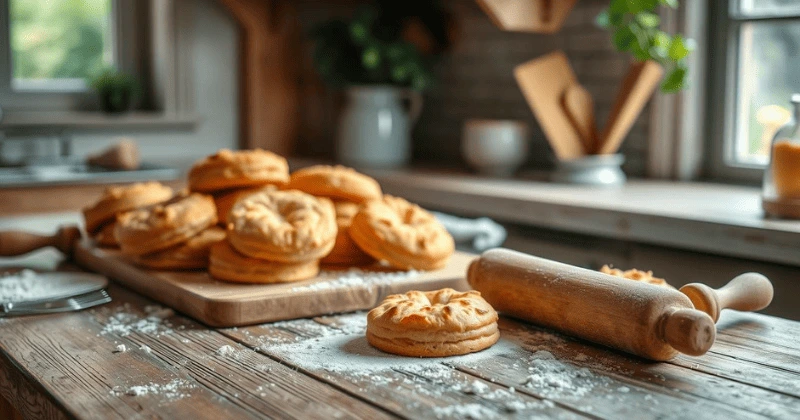
“The key to perfect biscuits is all in the technique. Once you get the hang of it, you’ll be whipping up batches of fluffy, delicious biscuits in no time!”
Troubleshooting Common Biscuit Problems
If you face biscuit issues, don’t worry. Here are common problems and solutions to help you:
| Problem | Solution |
|---|---|
| Dense, dry, or tough biscuits | Use the right flour-to-liquid ratio and avoid overworking the dough. |
| Biscuits that don’t rise properly | Check your baking powder and make sure your oven is preheated. |
| Biscuits that spread too much | Chill the dough before baking and handle it carefully. |
You’ll soon be baking biscuits quickly with practice and these tips like a pro.
Buttermilk vs. Regular Milk Variations
Choosing between buttermilk and regular milk can significantly affect your biscuits. Buttermilk adds a tangy flavour and a tender texture. Regular milk, however, gives a neutral taste and a lighter crumb.
Flavor Differences
Buttermilk biscuits taste richer and tangier than those made with regular milk. The acidity in buttermilk makes the dough tender and boosts the flavour. Regular milk, by contrast, offers a subtle taste, letting other biscuit flavours stand out.
Texture Impact
Buttermilk makes biscuits denser and more tender. Its acidity works with baking soda for a better rise and flakier inside. Regular milk results in a lighter, more delicate biscuit.
Switching to regular milk from buttermilk changes the biscuit’s taste and texture. Your choice depends on what you prefer in your homemade biscuits.
Troubleshooting Common Biscuit Problems
Baking homemade biscuits is a joy but can also come with challenges. Issues like flat biscuits or uneven browning are common. Knowing how to fix these problems can help you make perfect biscuits every time.
Flat Biscuits
Flat biscuits often happen when you use old baking powder. This leavening agent is key for biscuits to rise and be fluffy. Always check the baking powder’s expiration date and replace it if it’s too old.
Tough Biscuits
Overworking the dough can make biscuits tough. Too much mixing leads to gluten development, making the biscuits chewy. Handle the dough gently and mix only as needed.
Uneven Browning
Uneven browning is usually due to hot spots in your oven. To fix this, rotate the baking sheet halfway through baking. Using a baking stone or steel can also help even out the heat.
By knowing these common biscuit issues and how to solve them, you can become a pro at baking. Your homemade biscuits will be flaky, golden, and loved by all.
| Biscuit Problem | Possible Cause | Solution |
|---|---|---|
| Flat Biscuits | Old or expired baking powder | Replace baking powder with a fresh batch |
| Tough Biscuits | Overworking the dough | Handle the dough gently and avoid excessive kneading |
| Uneven Browning | Hot spots in the oven | Rotate the baking sheet halfway through cooking and use a baking stone or steel |
“The key to perfect biscuits is understanding the science behind the ingredients and the techniques. With a little practice, you can master the art of baking flaky, tender biscuits every time.”
Storage and Reheating Methods
Enjoying freshly baked homemade biscuits is a true delight. But what happens when there are leftovers? Proper storage and reheating techniques are key to maintaining your delicious biscuits’ perfect texture and flavour.
To store cooled biscuits, place them in an airtight container at room temperature for up to 2 days. Or refrigerate them for up to 1 week. For longer-term storage, freeze biscuits for up to 3 months. Wrap each in plastic wrap or foil and put them in a large plastic bag.
When it’s time to enjoy those biscuits again, the oven is the recommended method for reheating. Preheat your oven to 350°F (175°C). Pop the biscuits in for 5-7 minutes if they’re at room temperature or refrigerated. Or 12-15 minutes if they’re frozen. This ensures even heat distribution and helps restore the soft, buttery texture.
Chef Lazarus Lynch suggests the oven as the best option for reheating biscuits. It provides the ideal balance of warmth and moisture to revive their freshly baked qualities. The cast-iron skillet method is also a great choice, delivering a combination of soft and crispy textures that mimic the taste of newly baked biscuits.
The air fryer can be a convenient choice for quick reheating. It restores the biscuits’ soft, buttery texture in minutes. However, avoiding the microwave is best, as it can lead to a rubbery and undesirable result.
Remember, the key to enjoying leftover biscuits is to freeze them unbaked. This way, you can bake them fresh whenever the craving strikes. Ensuring you always have warm, flaky homemade biscuits on hand.
Even if your leftover biscuits become a bit too hard, don’t worry. They can be repurposed in various ways, such as in stuffing or bread pudding. This minimizes waste and maximizes the deliciousness of your homemade biscuits.

Serving Suggestions and Pairings
Homemade breakfast bread, like fluffy biscuits, is perfect for many dishes. You can enjoy them with sweet or savoury toppings. Biscuits are great for a variety of tasty pairings.
Sweet Toppings
Try honey butter or your favourite jam on biscuits for a cosy breakfast. They’re also great for strawberry shortcakes. Biscuits, berries, and whipped cream make a delicious combo.
Savory Combinations
Biscuits are also well-suited to savoury foods. For a Southern-style meal, serve them with peppery sausage gravy. Alternatively, use biscuits for breakfast sandwiches with eggs, cheese, and meat.
For a filling meal, pair biscuits with soups and stews. Their flaky texture is perfect with creamy chicken noodle soup or beef stew.
Recipe Variations and Adaptations
Homemade biscuits are a versatile staple that can be easily customized to suit your preferences. Whether you’re in the mood for savoury or sweet, there are endless possibilities to elevate your biscuit recipe.
Try incorporating aromatic herbs like rosemary or thyme into the dough for a savoury twist. The earthy flavours will pair beautifully with the biscuits’ buttery richness. You can also experiment with shredded cheese, diced olives, or even crumbled bacon for a flavour-packed experience.
If you’re craving something sweet, a sprinkle of cinnamon sugar or a drizzle of honey can transform your biscuits into a delightful treat. Alternatively, you can fold in dried fruit, such as cranberries or raisins, for a burst of natural sweetness.
For a nuttier flavour profile, consider substituting a portion of the all-purpose flour with whole wheat flour. This addition will lend a heartier texture and a lovely earthy note to your biscuit recipe.
One contributor from Chandler, Arizona, shared an innovative adaptation involving pumpkin biscuits topped with apple butter, while a contributor from Olympia, Washington, mentioned a simple yet delicious way to enjoy biscuits by dipping them in butter and coating them with cheese.
Regardless of your preferences, the biscuit recipe’s versatility allows you to experiment and find your perfect flavour combination. You can turn a simple biscuit into a truly unique and satisfying baked good with some creativity.
Expert Tips for Making Ahead and Freezing
Preparing biscuit dough in advance and freezing it can be a game-changer. Cut the dough into biscuits and freeze them on a baking sheet. Then, move the biscuits to a freezer-safe bag or container for up to 3 months.
When you’re ready to bake, don’t thaw the biscuits. Please put them in a hot oven and add a few extra minutes to the baking time. This way, you can have fresh-baked, homemade biscuits anytime with little effort.
This method ensures your biscuits will be as fluffy and flaky as the day you made them. It’s a must for any biscuit cooking tips enthusiast. It lets you enjoy homemade biscuits whenever you want.
Whether you’re preparing for a crowd or want biscuits for a quick breakfast or a side dish, freezing is the best option. With this tip, you’ll become a homemade biscuit pro.
FAQ
What is the secret to a good biscuit?
Sourdough typically takes 4 to 12 hours to activate, depending on the starter’s maturity and environmental conditions. A warm setting accelerates the process, while cooler temperatures require patience. Before using it in a biscuit recipe, ensure the starter is bubbly and doubled in volume. Proper activation is crucial for achieving light, flavorful biscuits with a subtle tang.
How long will homemade biscuits keep?
When stored in an airtight container, homemade biscuits are typically kept at room temperature for 2-3 days. Refrigeration can preserve them for up to a week for extended freshness. If freezing is preferred, they can last up to three months. A well-executed biscuit recipe ensures optimal texture and flavor, making proper storage essential to enjoying them at their best.
How do you know when biscuits are cooked?
Biscuits are cooked when their tops turn golden brown, and the edges pull slightly away from the baking tray. An adequately baked biscuit will feel firm yet light when gently lifted. For precision, check the interior; it should be fluffy and fully set. A well-followed biscuit recipe ensures even baking and a perfectly tender texture every time.
What can make a biscuit tough?
A tough biscuit often results from overworking the dough, which activates gluten and compromises the flaky texture. Excess flour or insufficient fat can also lead to a dense, hard outcome. A gentle touch is key when following a biscuit recipe, ensuring the ingredients are combined just enough to create tender, buttery layers without sacrificing softness and fluffiness.
What makes biscuits taste better?
Biscuits taste better with high-quality ingredients like fresh butter, buttermilk, or cream, which enhance richness and flavor. A pinch of sugar balances savory notes, while a touch of salt intensifies the overall taste. Following a well-crafted biscuit recipe ensures the right proportions while handling the dough gently preserves texture. Adding herbs or cheese can elevate them to gourmet perfection.
What keeps biscuits fresh?
To keep biscuits fresh, store them in an airtight container at room temperature for up to three days. Wrapping them individually in foil or plastic wrap helps retain moisture. Refrigeration extends their life but may alter texture slightly. A well-executed biscuit recipe creates a product that maintains flavor and softness with proper storage practices, ensuring freshness and enjoyment.
What are the characteristics of a good biscuit?
A good biscuit boasts a golden, flaky crust and a soft, airy interior that melts in your mouth. Its flavor is rich, with a perfect balance of buttery notes and a hint of salt. Following a well-structured biscuit recipe ensures consistent texture and taste, creating a tender, light, and irresistibly satisfying biscuit with every bite.
Does biscuit dough need to be chilled?
Chilling biscuit dough is not always necessary but can sometimes enhance results. Cold dough helps maintain the integrity of the butter, creating flakier layers when baked. If your biscuit recipe includes high-fat content, chilling can prevent spreading and ensure a light, tender texture. This simple step can elevate your biscuits from good to exceptional.
What happens to biscuits when they expire?
When biscuits expire, their texture becomes stale and dry, losing their signature fluffiness. The flavor diminishes, and they may develop an off taste or odor in some cases. Following a reliable biscuit recipe and proper storage can extend their shelf life, but consuming them past their expiration may compromise taste and safety, especially if mold appears.
Do biscuits go hard or soft?
Biscuits can become hard or soft depending on storage conditions. Exposure to air often causes them to dry out and harden, while storing them in a humid environment may make them soft and soggy. A well-prepared biscuit recipe initially creates a balanced texture, but proper storage in airtight containers is crucial to maintaining their original quality and consistency.
What is the best temperature for biscuits?
The ideal temperature for baking biscuits is typically 425°F (220°C). This high heat ensures a golden, flaky exterior while maintaining a soft, airy interior. A well-crafted biscuit recipe will specify this temperature to allow the dough to rise quickly, creating layers and preserving moisture. Consistent oven calibration is key to achieving perfect biscuits every time.


